Dear users,
we continue sharing the most useful and important information which without a doubt will come in handy in your daily work.
We all know that one of the main purposes of every tracker is to collect statistics and present it to the user in a convenient format. And today, we’d like to talk more about it.
The AdsBridge statistics is rather informative and comprehensive; however, there are a few nuances that should be covered.
In this article, you will find out how to:
– use the bot filter
– get the needed reports
– make a breakdown by specific period
First, let’s review the possibilities of AdsBridge statistics.
The section consists of 4 subsections: 
1. Global report.
Here you can view statistics of all campaigns (in the Total tab), specific campaigns, traffic sources, affiliate networks, offers and landing pages.
In order to form a report in this section, you can use two buttons: Customize and Filter
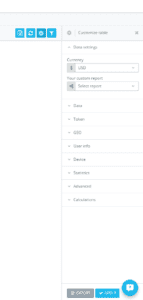
The Customize button enables you to add a new column to your report:
You need only to click on the drop-down list and mark the checkbox next to the required column.
Note that not all reports have Sub ID columns because a report can be created for various traffic sources with different Sub ID.
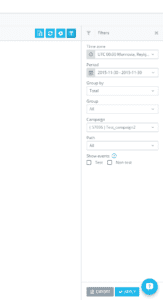
The Filter button enables you to choose an appropriate time zone, period, object or a group of objects for statistics:
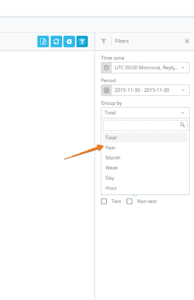
Moreover, you can group a report by periods:
For example, you want to view in which month for a selected period the results were better. Just choose to group by month
After setting all filters, click on the Apply button and the table will be formed.
In the resulting table, you can apply filters to columns by clicking on the filter icon or by sorting out a column: 
You can click on the filter icon to filter by the column content:
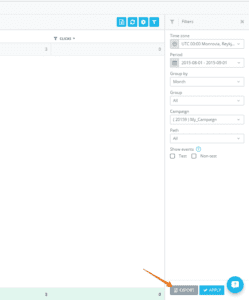
 In addition to online upload, you can export this report in .csv format by clicking on the corresponding button:
2. Conversion report:
This report displays the detailed information on conversions.
Using the Customize button you can mark checkboxes you need. In contrast to the Global report, there are columns for the information from a postback placed on the side of an affiliate network. If you set up a conversion status in a postback URL, you will be able to display it in the report.
3. Conversion upload:
Here you can manually upload conversions by entering click IDs that converted but were missed by tracking pixels.
All conversions will be pulled into statistics for the date of their manual upload.
4. Manage custom reports:
This section speeds up the process of getting the needed reports in statistics. Here you can create as many pre-set reports as you need.
In order to create a report, click on the button in the upper right corner, choose a report type (for each section) and columns from the drop-down lists, and then click on the Save button:
 To apply this report, select it in the Customize section:
It’s no secret that many traffic sources are concerned as for their traffic to reach the set target. Therefore, your campaigns must go through a process of bot moderation before the real traffic goes on them.
To send bots somewhere, or else determine the number of bot redirects, you can set up our bot filter.
You will find it in the Campaign section:
The setting consists of two stages: general and rules.
On the General tab you can:
1. Enable or disable filter
2. Choose filter type:
– Filtering allows you to send bot traffic anywhere
– Detecting only determines bots, distributing them on your campaigns by rules.
3. Choose a site where you want to send traffic for the Filtering type.
On the Rules tabs, you can set up rules for filtering:
The setup is the same as for the rules of campaign distribution. Traffic that corresponds to the set rules will be considered bot and will be either filtered or simply displayed in statistics as bot traffic depending on your settings.
After setting up the bot filter, activate it in the Campaign settings, on the second step:
 In order to see the bot events in statistics, simply mark the corresponding checkboxes:
The test events and test link
We created a test link so that the test events are not mixed with your statistics and are not counted altogether. The following types of filters are added in the Manage section, Global report and Conversion report sections:
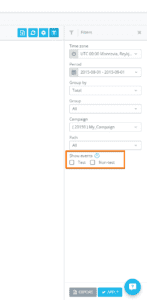
Thus, by marking one or both checkboxes, you can view statistics only by test events, non-test events, or their summary.
Log in to your account to tweak with all these settings and effectively use them to get more precise data.
Keep up-to-date with AdsBridge news. There is much more we are preparing for you!


