This subsection implies the management of user accounts created earlier.
By hitting the “Create user” button, you will be redirected to the “Create user” subsection.
Here’s the list of available actions:
“Make active\inactive” – this option enables you to switch on\off the additional user’s access to the account.
“Edit” – with this option, you can change over to the additional user’s edit page.
“Delete” serves to remove the additional user’s account.
“Export” – this option allows you to upload the information from the “Manage users” page as a .csv file. The data is uploaded in the form of a grid displayed on the screen.
“Customize table” – with the help of this button, you can activate the side-board containing the settings of data display on the checkbox page: ID (the account ID in the system), First name (a user’s first name provided in account settings), Last name (a user’s last name provided in account settings), Email (a user’s email provided in account settings), Role (a role selected in account settings), Created (the creation date of an additional user’s account), Last connect (date and time when the additional user logged to the system for the last time), Status (Active/Inactive; this option shows whether the additional user currently has access to the system). Using these checkboxes, you can set up the displaying of user data within the “Manage users” subsection.
“Filters” – this buttons activates the side-board with the help of which you can filter the visual display of the users on the page. You can make use of the following filters:
Status – Active/Inactive.
Role – the drop-down menu entails a list of all roles created by you.
Email is an option to filtering users by email. Please note that search by email is carried out on the overlapping basis.
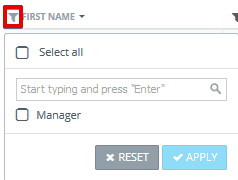
The values in all columns may be filtered by the column itself.
Upon click the arrow to the right of the name of the column, there is an option to sort by alphabetical order (A-Z, Z-A, A-Я, Я-А) or by amount (from least to greatest and vice versa).
When you right-click on a line with a certain user, you will have the following options: make active/inactive, edit, delete.

