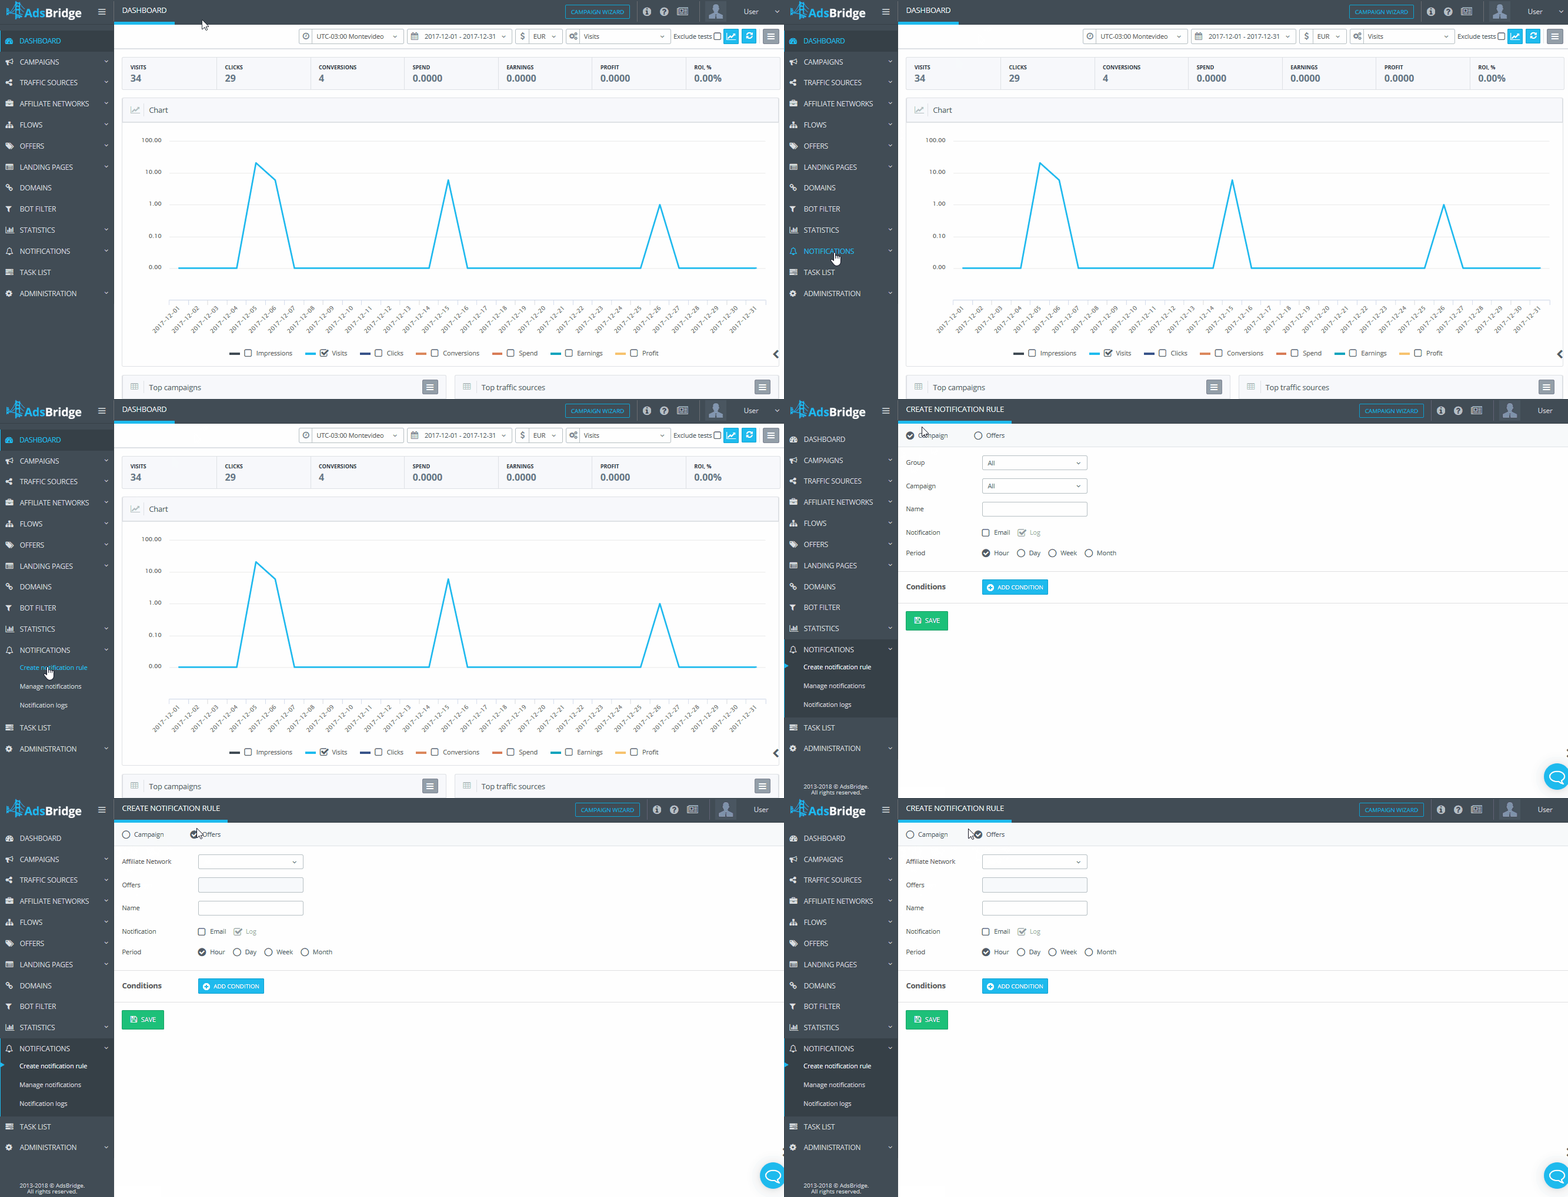
Here you can create notification rules depending on which system will be sending notifications. You can set up notifications for campaigns and for offers separately.
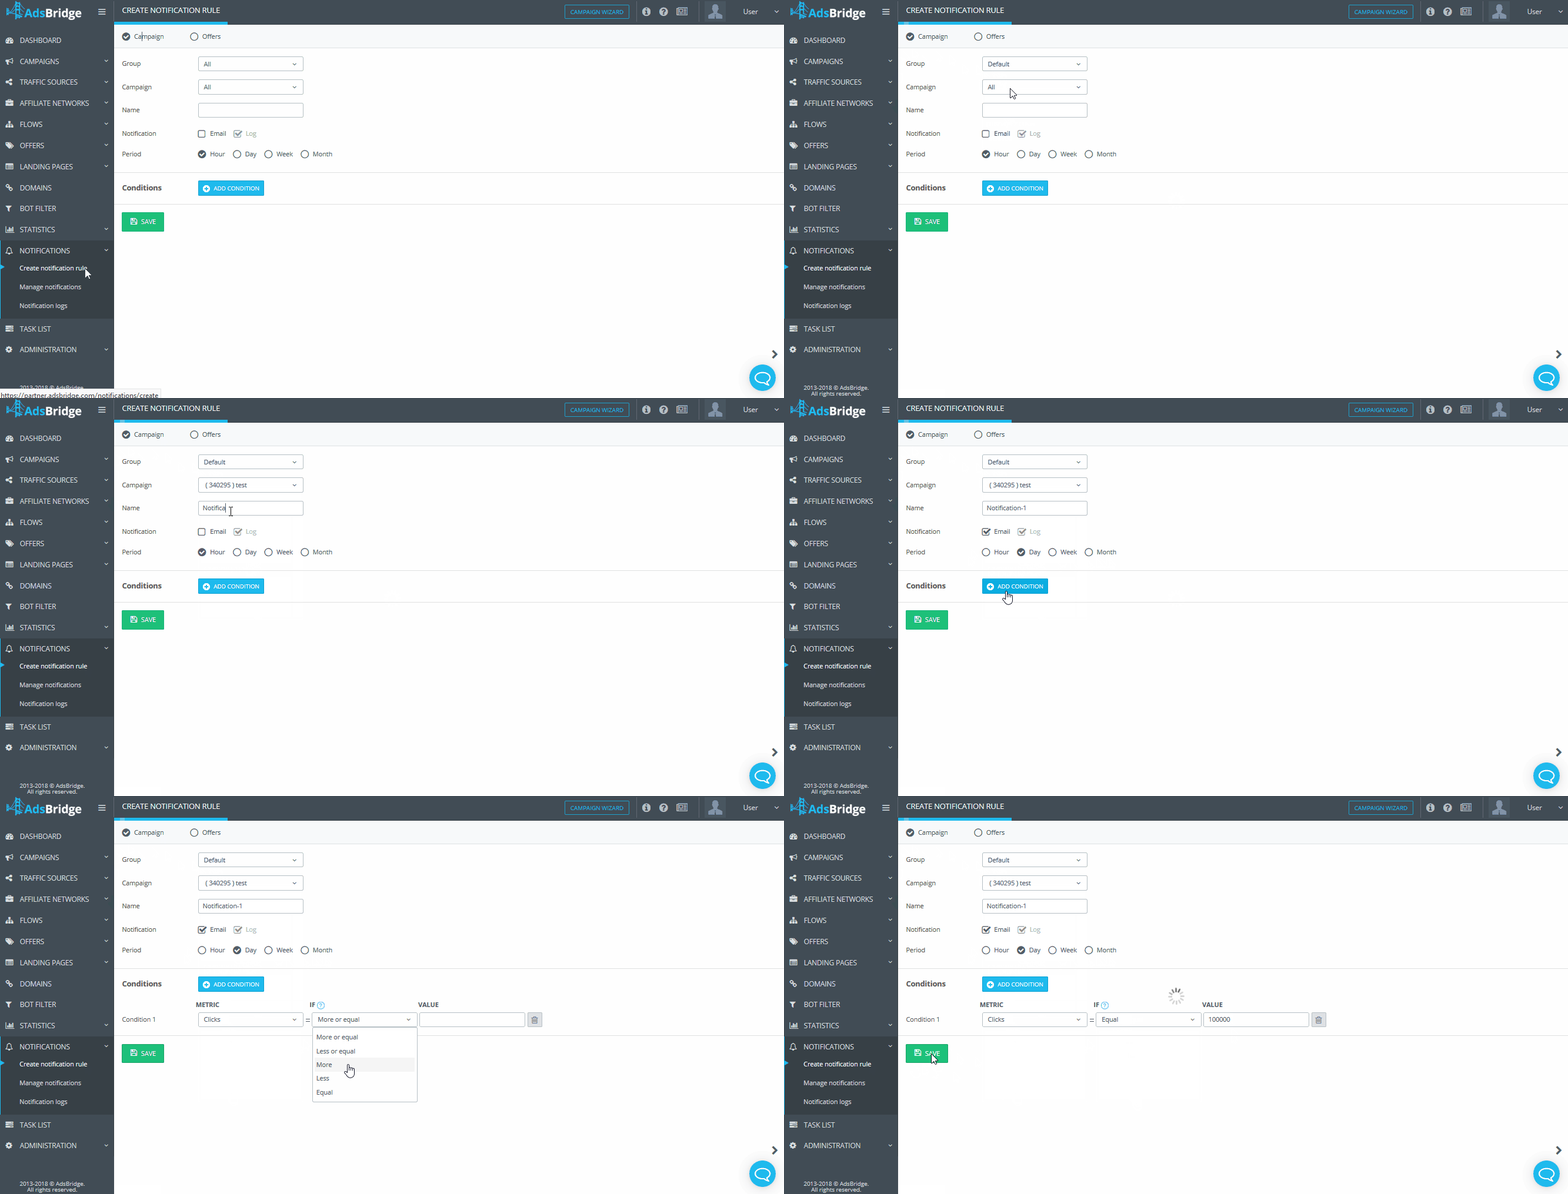
Campaign Notifications
“Group” – You may select either a specific group of campaigns, or all groups.
“Campaign” – You will need to choose a particular campaign here.
“Name” – This is the name of the rule, and it is a required field.
“Notification” – Choose the method of notification you would like. By default, all notifications are linked to the email address of your account + Notification logs.
“Period” – You may choose the frequency of notification. You may choose: hour, day, week, month.
In order to add specific conditions for notifications, you need to click on the “Add condition” button.
Now let’s take a look at the “Conditions” block:
“Metric” – here you can select the desired value for which you would like to receive notifications from the drop-down list. The following options are available: visits, clicks, conversions, EPV, EPC.
“If” – Select one of the “If” options, according to which the campaign metric will be compared with the entered number in the “Value” field. You can choose the options “More or equal”, “Less or equal”, “More”, “Less”, “Equal”.
“Value” – in this field you need to specify the value with which the campaign metric will be compared.
You can add several conditions. To delete a condition, you need to click on the “Delete condition” icon next to the value entry field.
After saving, the rule will be available on the “Manage notifications” page.
You can create an unlimited number of rules for notifications.
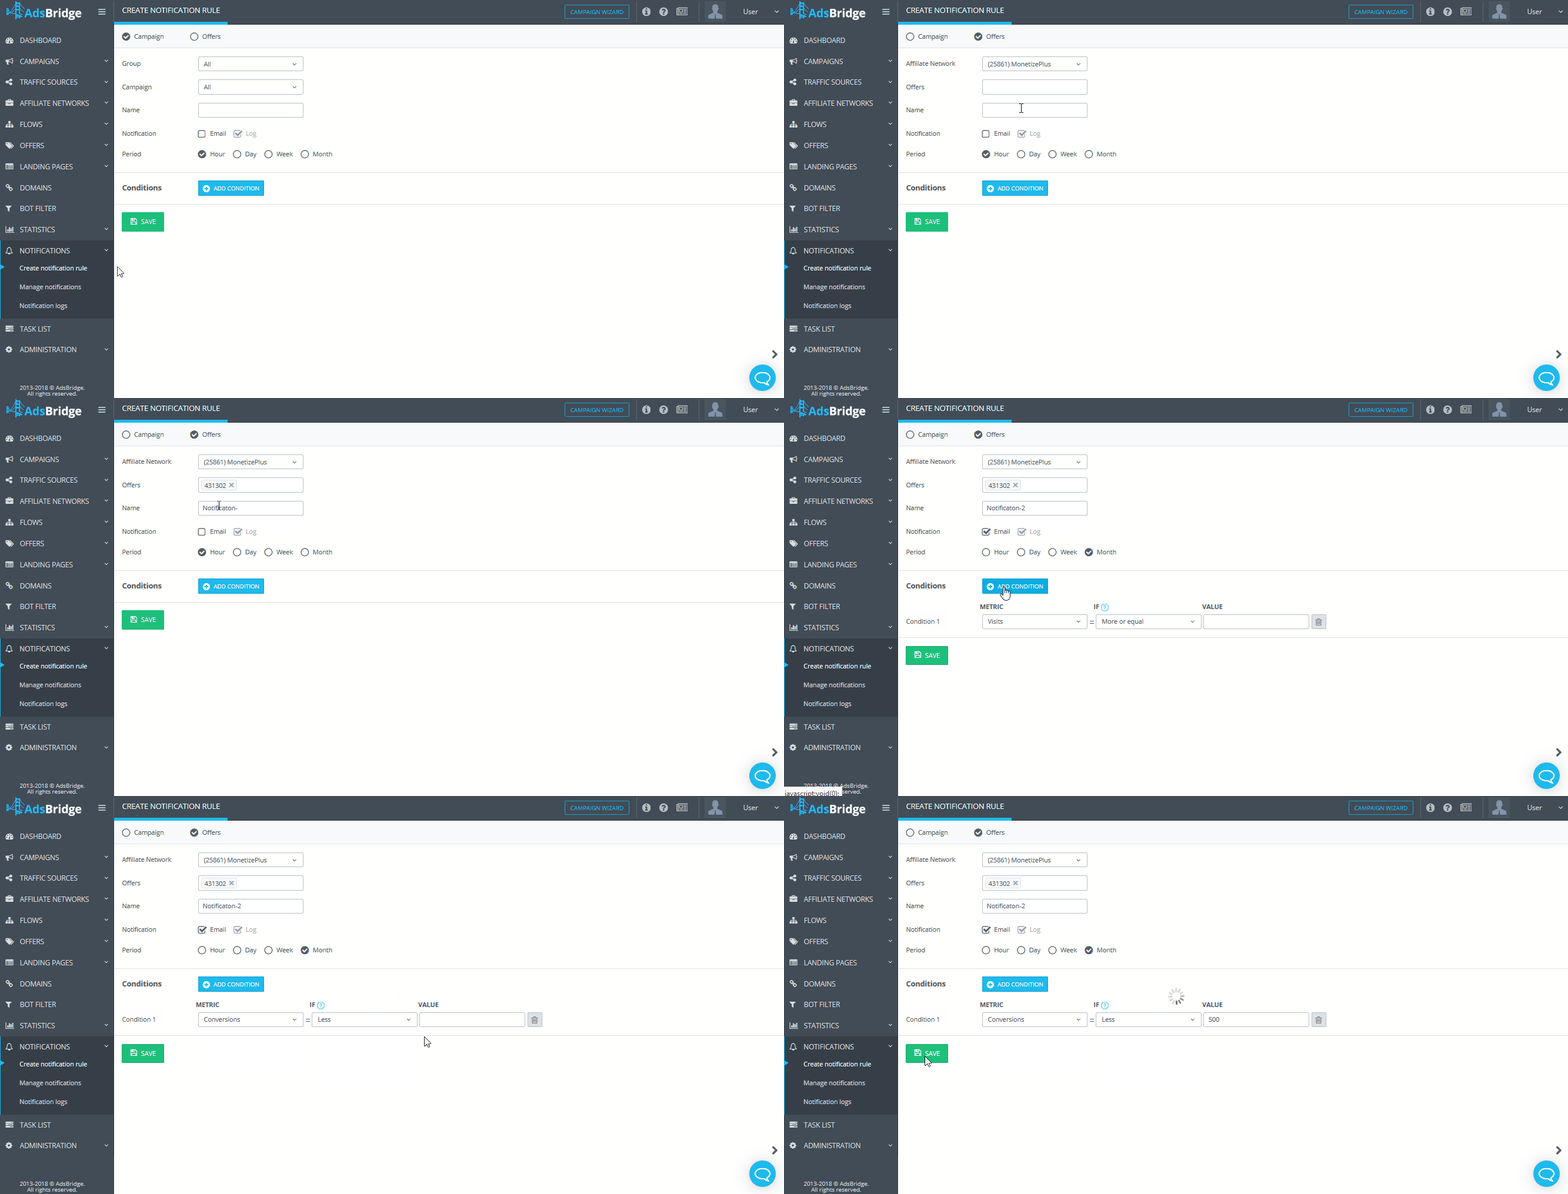
Offer Notifications
“Affiliate Network” – a list of all affiliate networks created in your account. You can select only one affiliate network.
“Offers” – a list of offers, that are connected to affiliate network selected on the previous step. NOTE: this field is unavailable if affiliate network isn’t selected.
“Name” – the name of a notification. The field is required, you won’t be able to create a notification without name.
“Notification” – select the notification type. Email (notifications will be send to the email specified in your account) and Log (selected by default).
“Period” – you can select the frequency with which the condition will be checked. Available options: hour, day, week, month.
To add specific condition to notification just press “Add Condition“.
Now let’s take a look at the “Conditions” block:
“Metric” – here you can select the desired value for which you would like to receive notifications from the drop-down list. The following options are available: visits, clicks, conversions, EPV, EPC.
“If” – Select one of the “If” options, according to which the campaign metric will be compared with the entered number in the “Value” field. You can choose the options “More or equal”, “Less or equal”, “More”, “Less”, “Equal”.
“Value” – in this field you need to specify the value with which the campaign metric will be compared.
You can add several conditions. To delete a condition, you need to click on the “Delete condition” icon next to the value entry field.
After saving, the rule will be available on the “Manage notifications” page.
You can create an unlimited number of rules for notifications.


